I’m on an odyssey to see how many things I can make with one yard of fabric. This is the first of a series of tutorials I’m sharing—all utilizing the same one yard of fabric (and very judicious cutting). The first four are designed to imbue a bit of freshness to my bathroom décor and the last two are for getting out and enjoying nature.
For this experiment, I bought a yard of Moda’s Chez Moi Posh Painted Patch Paisley Sunshine fabric. I’ve used this same fabric before and liked it so much I chose it again for my one-yard adventure.
SHOWER CAP TUTORIAL
SHOWER CAP TUTORIAL
Supplies
- Fabric
- Water-soluble pen
- Super-thin vinyl (near the tablecloth fabrics at Jo-Ann’s)
- Scissors
- Needle and coordinating thread
- ¼” wide elastic 2” shorter than the circumference of your head
Step 1: Draw a 24” circle with a water-soluble pen on the wrong side of my fabric and cut out. The size of the cap can be adjusted by adding or subtracting how many inches you need based on your size head. I consider my head to be of average size.
Step 2: Use the fabric circle as your template for cutting out the same-size circle from the vinyl.
Step 3: Place your vinyl piece on top of the wrong side of your fabric and baste to keep it from sliding as you work with it.
Step 4: Turn the edges of the fabric piece under ¼” towards the vinyl (and wrong side of the fabric) and press. Be careful not to use too hot an iron and stay along the rim of the fabric itself.
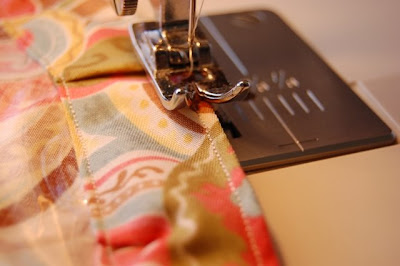
Step 5: Turn under the new edge an additional 1” and sew close to the inner edge (near the exposed vinyl), leaving a 2” opening.
Step 6: Sew ¼” around the circumference of the outer edge (no need to leave an opening for this part.
Step 7: Insert your elastic into the opening made earlier, place a pin to secure it in place while you work the elastic around the rest of the cap. When you reach the other opening, pull it out enough to overlap both ends of the elastic. Pin.
Step 8: Sew a small box on the overlapped elastic pieces to secure them, and then sew an “X” from corner-to-corner of the box.
Step 9: Slip-stitch the 2” opening closed.
You're done!


8 comments:
Thanks, Junie!!
Wonderful idea - I love your tuts!
I'm thinking "Christmas gift ideas", hummm....
Mind if I link you on a post about your series?
Have a safe, wonderful holiday weekend!
Cathy
Wow, thanks! First of all I've been looking all over for a sturdy and pretty shower cap. Second of all it looks so easy to make. I love that fabric and used it once to make a wristlet for a friend. I'll let you know when I make my own shower cap!
Junie, you never cease to amaze me. That is one stylish shower cap! Can't wait to read about your other 1 yard tutes.
Jody
Oh this is so cute, what a great idea!
Very cute shower cap June! I love te fabric you choose.
Hugs, Pat
Interesting story you got here. I'd like to read more concerning this matter. Thnx for posting this information.
Sexy Lady
London Escort
Thanks for the wonderful tutorial :)
You've been featured on homemadehaven.com – where we showcase the best homemade tutorials and recipes on the net.
Cheers! :)
Helllo nice post
Post a Comment