Thursday, June 25, 2009

Hitting the Road

My preparations are done, the car is packed, my GPS is primed and ready for action, and we’re heading out on our road trip.


© June Scroggin, All Rights Reserved

Adventures enjoyed will be shared upon my return July 5. In the meantime, take care of yourselves.

Hugs!


Wednesday, June 24, 2009

My Paris Traveler’s Bag

We’re leaving at the crack of dawn Friday morning for vacation. We’ve opted to do a road trip this summer starting here in Tucson and driving to the following environs:

  • Grand Canyon
  • Page, AZ where we’re signed up for a photography outing at Antelope Canyon
  • Bryce Canyon, seeing Escalante National Monument and North Rim along the way
  • Zion National Park
  • Las Vegas
  • Hoover Dam
  • Lake Havasu, AZ to see the famous London Bridge which was transplanted here years ago
Amongst other tasks involved in getting ready for our trip, I’ve done a bit of sewing. After making the Amy Butler kimonos, I started working on an adventure bag using Fig Tree’s “My Paris Traveler’s Bag” pattern. For those who’ve slaved over Amy Butler’s Weekender Bag (I’ve made 3), this bag was just as complicated, although at least I didn’t have to deal with heavy-duty interfacing like Timtex.

My fabric choices:

  • Main body: Patisserie (Fig Tree Quilts) pattern #20106
  • Handles: Patisserie (Fig Tree Quilts) pattern #20104
  • Lining: Solid for Moda.
My fabrics, including muslin and fusible interfacing, were purchased at The Quilt Basket here in Tucson.


© June Scroggin, All Rights Reserved

The first thing you have to do is to quilt your main fabric piece which took me an entire day. I decided to quilt around some of the topographical elements. The gusset piece is pleated on each bottom side in case you’re wondering what’s wrong with the bag bit on the right side.

The finished bag measures 23”x15”x9”. I “borrowed” a neighbor who’s about my height (5'2”) to give you an idea of the size. It’s certainly going to be the only bag I need for our road trip.


© June Scroggin, All Rights Reserved

My zipper is two-way so I can get in the bag easily from either end. I added a little charm pull.


© June Scroggin, All Rights Reserved

This shows you the lining fabric on the interior of the bag.


© June Scroggin, All Rights Reserved

After slaving away quilting the main fabric, I wasn’t going to let any of my efforts go to waste. So this morning I used leftover main and lining fabrics to make a square-bottomed zippered accessory bag. I just made it out of my head, no pattern or tutorial used.

A couple of notes if you decide to try this project; there were moments I just wanted to chuck the whole bloody thing in the trash and go to bed. Although the pattern says it’s easy, it’s not. Cutting measurement problems in the first issue of the pattern have since been corrected. Check their web site to make sure your pattern copy has the corrections.

Take the project very slow and don’t try to do it in two days like me. Read the instructions very carefully and think long and hard about what you’re doing before cutting and sewing anything together. While I love the end result, I do think the instructions ought to be rewritten and better illustrations provided.

The Big 400 Give-Away Winner

Thank you for all the great comments you left about my blogiversary and your vacation plans. If you have a few minutes, you ought to read those comments and check out what folks are doing. From staycations to adventures in Borneo—amazing things are happening.

The lucky winner is Michelle of Michelle’s Quilting Journey
blog. She’s crafty and does an amazing amount of work to help others. Here’s what she said about her summer plans:
If I win, I will be having a homecation where I stay home and stamp fabric and then donate the art quilts I made to AAQI ! My vacations, I'm so sad to admit, all consist of frequent trips to Alaska to care for my aging parents. But while I am there, I do get to walk on my beloved Sandy Beach, see my family, and help out in my SIL's 2nd grade classroom. Oh, I work too hard, and don't vacate enough. But I do so love helping others, so I talk too much AND work too much.”

Michelle, please email me with your full name and snail mail address so I can mail out your package tomorrow.


Source: I haven't a clue.

I’ll be back later today to share my own vacation plans and what I’ve stayed up doing until 1:30 a.m. for the last two days. I’ve got to find a neighbor, the FedEx lady, or maybe snag the mailman to hold my project so I can photograph it—why they aren’t ready and willing to model for me at 1: 31 a.m. is beyond me.

Sleep, I need sleep. G’night/mornin’.

Tuesday, June 23, 2009

Amy Butler Kimonos

I’m having a lot of fun reading all the comments from yesterday and discovering all kinds of delights to consider for myself in future. Tomorrow I’ll share our upcoming vacation plan.

Don’t forget about my give-away, visit my post here to enter your name in the drawing.

In the meantime, I’ve been busy sewing, using a project from Amy Butler's In Stitches: More Than 25 Simple and Stylish Sewing Projects

My husband says the Amy Butler kimono is really comfortable and asked me to make him another one. He had to leave early Sunday morning for a business trip, making the robe gave me something to do.


© June Scroggin, All Rights Reserved

I really cannot figure out how to take a decent picture of robes. If he was home, I would have asked my husband to model it. Ah well.


© June Scroggin, All Rights Reserved

The fabric was bought at Jo-Ann’s. The design looks like a Celtic knot.


© June Scroggin, All Rights Reserved

I think he’ll like the brown and blue colors as well as the print design.


© June Scroggin, All Rights Reserved

While I was at it, I made a robe for myself, too. One modification made to the pattern is adding a piece inside the top so we can hang our robes on hooks in the bathroom. I simply used the belt loop pattern piece to make the hanging loop.


© June Scroggin, All Rights Reserved

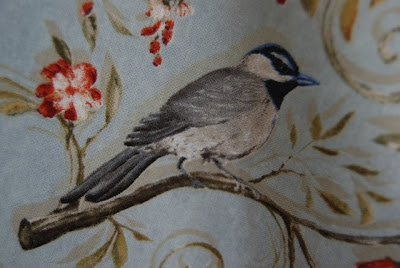
My robe has wonderful illustrations of various birds all over it. I found this fabric at Jo-Ann’s, too.


© June Scroggin, All Rights Reserved

Our new robes are holding hands.


Monday, June 22, 2009

The Big 400

Today is my 400th post. In writing about this milestone on their own blogs, many people say something along the lines of “who knew I had so much to say”. That’s so not me. I have plenty to say and could probably post many times a day if left to my own devices. If I write a lot, then you can imagine I talk a lot, too. Be glad you don’t live with me.

To celebrate, I’m offering a give-away—a collection of Anna Griffin stamps and kits.


© June Scroggin, All Rights Reserved

Some fun phrases and a brass stencil kit.


© June Scroggin, All Rights Reserved

Two alphabet sets.


© June Scroggin, All Rights Reserved

A starter stamps gift box with project guide; the following picture shows what’s inside.


© June Scroggin, All Rights Reserved

The Rules

  • Leave a comment on this post sharing where you’re going (or maybe you’ve already been) for vacation this year—even if you’re just having a staycation. I’m very curious as to what everyone is doing this summer.

  • Leave your comment by midnight (MST) on Tuesday.

  • I’ll post the winning name on Wednesday morning. If your name is drawn, please contact me by midnight (PST) on Wednesday with your full name and snail mail address so I can mail out your package on Thursday. My email address is in the sidebar on the right.
Hugs!

Sunday, June 21, 2009

Summer’s Gifts of Grace

Summer solstice occurred at 1:46 this morning which means summer is officially here. To me, summer is the epitome of celebrating life.

Although the June solstice marks the beginning of Northern summer, it is often called midsummer. In traditional Gaelic culture the summer solstice represented the mid-point between the commencement of the Celtic summer on May 1 and autumn on August 1” (source: Science at NASA).


Source: Sky &
Telescope

Sky-watching any time of the year is something we enjoy. During the day on solstice, the sun appears to stand still. But the solstice sky that emerges after the sun has graciously nodded to the dark brings another kind of magic. You can view the Milky Way arching over the eastern horizon after twilight, witness the darkening of Saturn's rings as well as the brightening of Venus, and then there’s Jupiter’s tumultuous transition—night’s gifts of grace.


© June Scroggin, All Rights Reserved

Yesterday afternoon a gorgeous orchid plant arrived at my house, a stunning gift from Sally at Grendelskin. It traveled from Hawaii to me in perfect condition. I’ve been longing to have an orchid plant since my husband and I visited the orchid exhibit last March. Sally’s generosity has graced my life. Thank you, Sally!

It’s Sunday, Father’s Day, summer solstice, and beautiful orchids are growing at my house—what a fantastic weekend. To share my blessings, I’m offering another give-away tomorrow, so please stop by again.

Welcome to summer!

Friday, June 19, 2009

Cupcake Saturday

I know, it’s really Friday, but It’s Cupcake Saturday party time at Bloggedy Blog Blog and our cupcakes have to be posted by midnight tonight.


I do not know anything whatsoever about decorating cupcakes as you will see in the photo of my efforts. You bake cupcakes and then you eat them—that’s always been my modus operandi.
The flip-flop cakes for our pool party were my first decorating efforts. Since cupcakes are small, I tried to keep it simple this afternoon in making a batch as a treat for the little girls in our neighborhood.


The Cupcake Saturday party gave me the opportunity to try Wilton’s new cupcake decals. Made from edible paper, they are supposed to melt into your freshly-iced cupcakes, leaving only the image on the surface. They look great in the picture on the package, perfectly blended into the cupcake icing. On my cupcakes, the decals just look like odd bits of paper-toweling stuck on top. I’m sure it’s my fault.


© June Scroggin, All Rights Reserved

Style-wise I didn’t do so well. Pleasing the kids, however, I did great. A pink princess ribbon wrapped around each cupcake thrilled the girls. If they’re happy, then I’m happy.

Perfect to share for the cupcake party is the following video created by Kirsten Lepore. It’s entitled “Sweet Dreams” and tells the adventure of a cupcake longing to sail across the sea to fulfill a dream.


One more little thing to share: I have a giveaway coming up early next week. In the meantime, hop over to see what cupcake delicacy Miss Saucy has created as well as other bakers on her Mr. Linky
list.

Blessings Friday: Delicious Things

Up in 3D


Source: Fandango, 2009 Walt Disney Pictures

We went to see Up Wednesday night. I’ve never been to a 3D movie before and the glasses gave me the giggles.


© June Scroggin, All Rights Reserved

Mr. Man wouldn’t let me drive home whilst wearing my cool new 3D glasses. Instead, I grilled him as to how many helium balloons he thought it would take for me to go on an airborne adventure:

Too many,” he said.

Hmmmm … “Is that a comment on my voluptuosity?“

Oh no, June Honey, I just meant it’s a physics/chemistry issue.” Then he creates an exhaustive list of assumptions and works up some kind of convoluted Man Math Formula to arrive at his hypothesis: approximately 3,200 helium balloons would be needed per 100 pounds of weight.

Uh huh.” I just keep driving, thinking about my 3D glasses as I lost interest in my proposed airborne adventure the very second math ensued.

Anyway, my assessment of the movie: hie yourself to the nearest theatre and see it.

Flowers


© June Scroggin, All Rights Reserved

For summery toes, just add flowers. And then add water.

Mmmmmango


© June Scroggin, All Rights Reserved

I want to live on a tropical island and eat mangoes all day, maybe even do the Mango Dance. No, I’ve no idea what this dance might be, delicious I imagine. Shall we just make it up as we go along?

Cupcake Saturday


Source: Bloggedy Blog Blog

Miss Saucy is hosting a virtual Cupcake Saturday party at Bloggedy Blog Blog. We must post our creations by midnight tonight, so check out my blog later, much later.

Thursday, June 18, 2009

Laptop Sleeve

Standard-sized laptop covers do not fit my wide-screen Dell Inspiron. Naturally, the solution is to make one myself.


© June Scroggin, All Rights Reserved

Yesterday I made the new cover using a
tutorial created by Elizabeth from Oh, Fransson! for Sew, Mama, Sew blog.


© June Scroggin, All Rights Reserved

The fabric used in the tutorial’s model (For Your Home designed by Vicki Payne) looked pretty great to me, so I ordered it in aqua from Sew, Mama, Sew.


© June Scroggin, All Rights Reserved

The tutorial is easy to follow and the resulting laptop sleeve is nice and cushiony. I love that it’s customized to perfectly fit my laptop. The tutorial provides a formula for measuring and fitting your laptop.

Tuesday, June 16, 2009

Thrifted Thread Rack

My husband found this framed thread rack at a garage sale some time ago. He bought it for me for fifty cents. It is made from pieces of wood and screws/nut thingies carefully tightened into place—functional but not all that attractive to me.


© June Scroggin, All Rights Reserved

It’s been living in my garage until I could decide what to do with it. Use as is? Take out the screws and line with fabric before putting the screws back together? Paint it different colors?


© June Scroggin, All Rights Reserved

This morning I decided to simply prime the piece and paint it white. Fortunately, supplies were already on hand enabling me to get right to work.


© June Scroggin, All Rights Reserved

Hanging the rack on the wall leaves more tabletop work space and helps me know what threads are already in my stash.

Monday, June 15, 2009

Flip-Flop Cakes and a Watermelon Fruit Kebobs Tutorial

Flip-flops made their appearance in a few details of our annual pool party—and not only in terms of our footwear. They could also be found in the invitation, table decorations, and the cakes I made.


© June Scroggin, All Rights Reserved

I baked four humongous simple rectangular white cakes, layering them in sets of two with a simple and easy mixture of strawberry and whipped cream filling. Flip-flop shapes were cut out using a very sharp knife and a template I made out of poster board. If you flip your template over after cutting out the first cake, then you have an opposing flip-flop (i.e., a right- and a left-shoe).

To make the cake images I had in my head a reality for this party, I took the first of a series of cake decorating classes over April and May. My friend Janel also took that class. She and her mother, Judy, came over Friday night to help me decorate the cakes and assemble the fruit kebobs. Their help was such a blessing and kept me from having to stay up all night.


© June Scroggin, All Rights Reserved

Air Heads ribbon candy worked wonderfully for making the thong pieces of the flip-flops. Because my cakes are over-sized, we simply seamed the ends of two of the candies together and added an icing flower to cover the resulting seam.

Earlier in the day I made huge amounts of icing and sorted it out into different containers to which food coloring was added to make a supply of multicolored icing for the decorations. Then Janel and I did fun things with our cake decorating bags/tips.


© Dub Scroggin, All Rights Reserved

We had so much fun decorating the cakes in crazy colors.


© Dub Scroggin, All Rights Reserved

Aren’t the cakes as cute as they can be?

Watermelon Fruit Kebobs Tutorial


© Dub Scroggin, All Rights Reserved

Here’s how to assemble a fruit kebob display that makes a great centerpiece and an easy treat for guests to handle.

  • Select the fruits you want to use for your kebobs. If using apples or other fruits that will turn brown, dip the fruit in lemon juice after cutting. Using long skewers, insert into bits of various fruit, filling about ½ of each skewer. I make these the night before a party, wrapping the finished kebobs well and storing in the fridge until time for assembly.
  • Dust a platter with brown sugar to simulate beach sand (optional). Slice a bit of the bottom of a watermelon (just the rind, don’t cut through to the fruit inside) so it sits flat on your platter.
  • Simply insert your assembled fruit kebobs all around the watermelon and its ready for folks to pull and eat.

© Dub Scroggin, All Rights Reserved

The watermelon was chock-full of the kebobs; in the picture, people were already pulling and enjoying them.

Pool Party Results

The party was a blast. We partied from 2 p.m. until the last group of guests left about midnight. My husband and I had everything cleaned up, the dishwasher doing its job, and all back to normal within an hour after the party. All the work was well worth it because everyone enjoyed the food, pool, and each other. We think this was our best party ever.

This post concludes my pool party series. Now I have sewing projects to do as one of our vacations is coming up very soon.