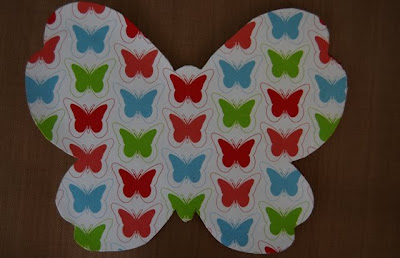
Last Thursday I told you about Holocaust Museum Houston’s effort to collect 1.5 million handmade arts-and-crafts butterflies in remembrance of all the children who died in the holocaust. The butterflies will form an exhibition scheduled for 2012 in remembrance of all the children who died in the holocaust.
My paper butterfly project is finished and ready to send to the museum. I used scrapbook materials to make a layered butterfly to give it dimension and a sense that its wings are moving. The finished size is 4½-inches wide by 3½ inches.
If you’d like to participate in the museum’s effort to remember the little ones lost in the holocaust, you can find more information here.
Paper Butterfly Tutorial
You can access a printer-friendly PDF version of my tutorial (includes the butterfly shape templates) here or in my side bar.
Supplies
- 1 piece double-sided printed cardstock (I used American Crafts’ Spring & Summer English Garden #34457, one side a butterfly print design, the other side solid)
- 1 piece of chip board or a pre-cut chip board butterfly shape
- Scissors
- Butterfly paper punch
- Ruler
- Pencil
- Bone folder
- Mod Podge
- Small disposable foam paintbrush
- Small foam sticky squares
- Butterfly template, click on the picture below to enlarge and print:
Directions
Step 1: From your double-sided scrapbook paper, cut out 3 large butterflies and 1 small butterfly (total of 4 butterfly shapes). Cut 1 large butterfly from the chip board.
Step 2: Using Mod Podge, adhere one large butterfly cardstock piece to one side of the chip board. Flip the chip board butterfly over and adhere the reverse side of your cardstock piece so you have one side with the print design and the other with the solid. See following 3 pictures. When done, set aside this piece for now.

© June Scroggin, All Rights Reserved
Step 3: Adhere the small butterfly to the third large butterfly shape using Mod Podge to make your winged layer.
Step 3: Adhere the small butterfly to the third large butterfly shape using Mod Podge to make your winged layer.

© June Scroggin, All Rights Reserved
Step 4: Punch butterfly shapes around the outer edge of the butterfly.
Step 4: Punch butterfly shapes around the outer edge of the butterfly.

© June Scroggin, All Rights Reserved

© June Scroggin, All Rights Reserved
Step 5: Find the center of the winged butterfly layer and run bone holder from one end to the other.

© June Scroggin, All Rights Reserved
Step 6: Gently bend the wings of your butterfly up along the creased line.

© June Scroggin, All Rights Reserved
Step 7: Cut the small foam sticky squares in half. You only need 3 small pieces.

© June Scroggin, All Rights Reserved
Step 8: Attach the foam squares to the print design sign of you winged butterfly layer.

© June Scroggin, All Rights Reserved
Step 9: Center the winged layer over the base butterfly layer. Gently press to adhere. You’re done.

© June Scroggin, All Rights Reserved


7 comments:
Very pretty June! Thanks for the template too!
Hi June,
Your butterfly turned out wonderful, and I appreciate the time that you took to create your thoughtful tutorial, very much.
Thank you!
Cool effort, and lovely interpretation to add to the exhibition!
found you through Daily DIY on One Pretty Thing. I was just looking at the Butterfly Project this week as a service learning project for my freshman community college students. I think this is such a great thing to do.
love your butterfly! :)
Yay! This is so delightful.
Very beautiful!
Hi, just found blog thru Mod Podge Rocks. Love this project! I'm doing an online "collection" of butterflies and butterfly project for my site www.thecozygreencocoon.com Was wondering if it would be alright if I posted a link and a pick of your project? Thanks (=
Post a Comment