Showing posts with label Halloween. Show all posts

Saturday, October 15, 2016

Halloween Time

© June Scroggin, All Rights Reserved

A Halloween cross-stitch project finished early this morning is now added to my October decorations. I love this month—it does seem to me to be a magic-filled month.

© June Scroggin, All Rights Reserved

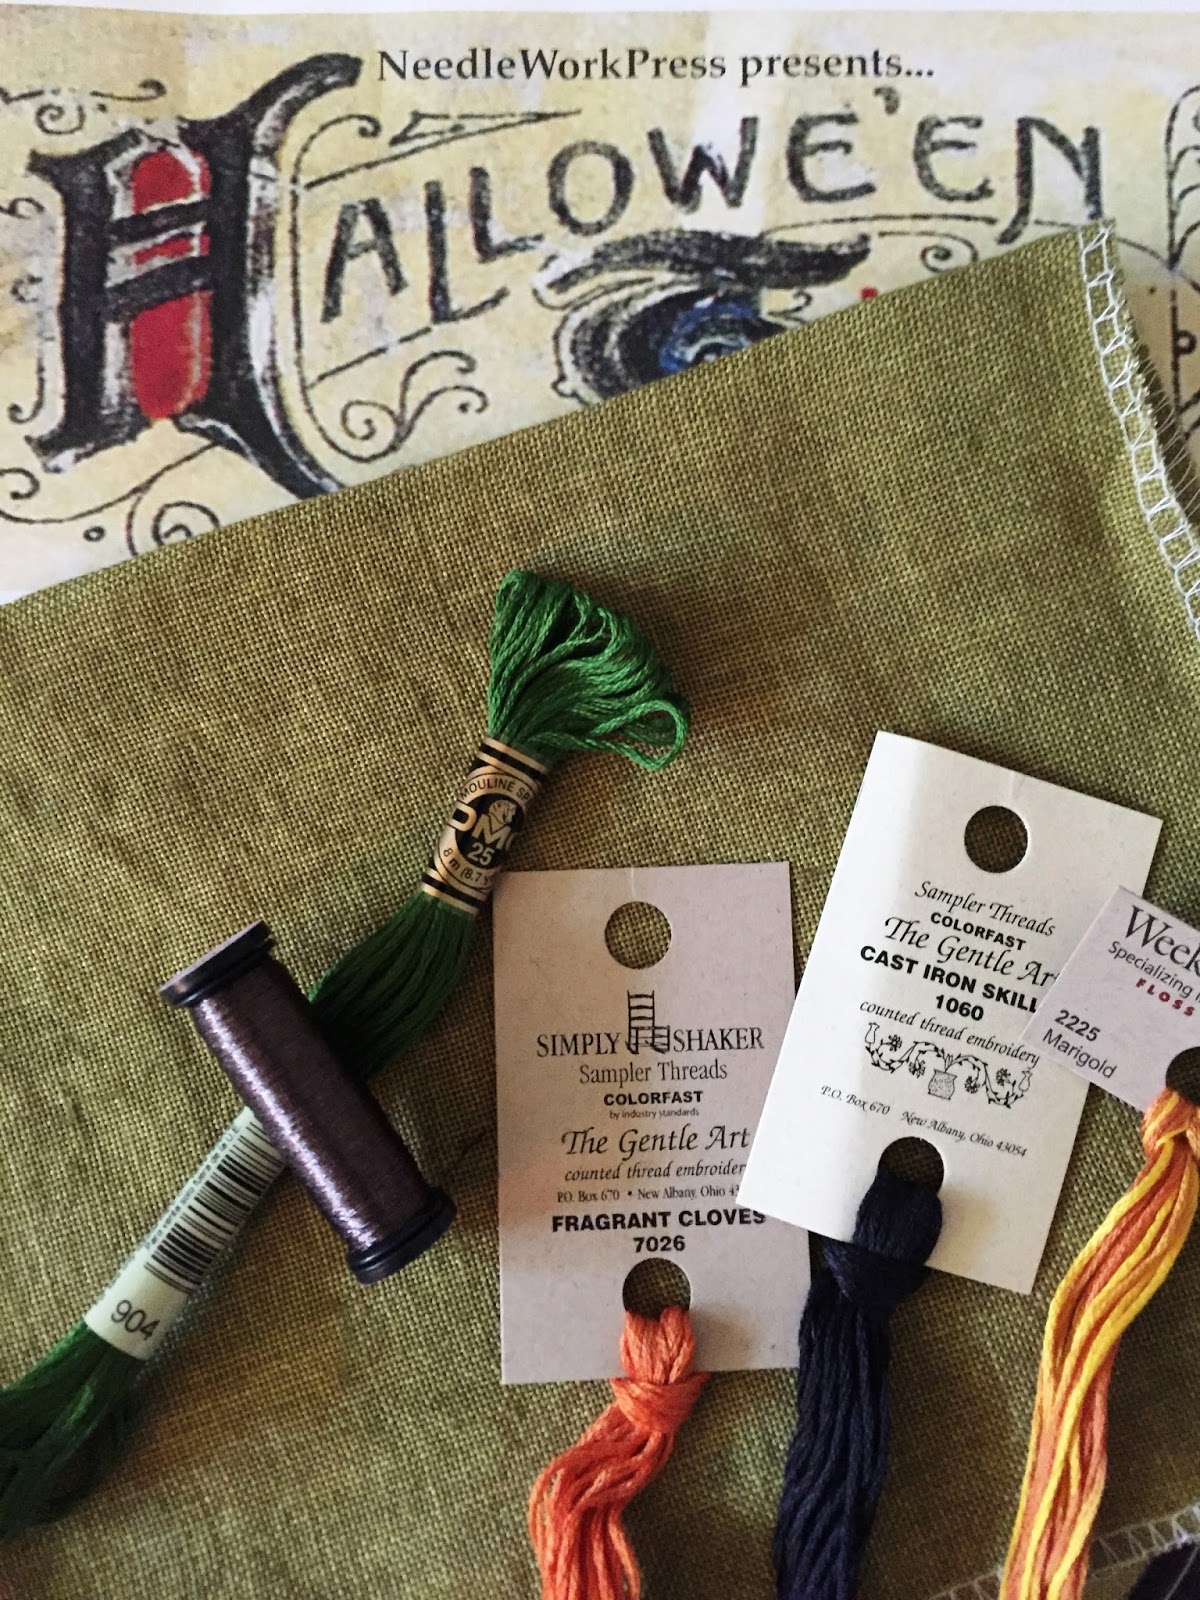
My new Halloween decoration is NeedleWorkPress' "Halloween Time". I ordered everything I needed from 123Stitch.com.

© June Scroggin, All Rights Reserved

The project is stitched on Weeks Dye Works 30-ct Grasshopper linen using one thread over one thread. Embroidery threads used are Gentle Arts Sampler Thread, Weeks Dye Works, and a Kreinik metallic for the numbers.

© June Scroggin, All Rights Reserved

The finished piece fits inside Tim Holtz's Idea-ology assemblage clock.  There is also a “Christmas Time” piece which came out at the end of September which I’ve got in the line-up to stitch. It can replace the Halloween work. As "times" change, I can store each piece inside the clock so nothing gets lost.

Saturday, October 31, 2009

Happy Halloween!

Happy Halloween—my favorite holiday of the year! Our treats are ready to give to the costumed characters visiting us this evening. Tonight is also when many folks adjust their clocks for daylight savings time. I think we can call this the witching hour this year.


© June Scroggin, All Rights Reserved


This is our huge pumpkin basket we fill with the treats we’re handing out. We bought the basket about 10 years ago at some store in Tucson which I can no longer remember.


© June Scroggin, All Rights Reserved


Just like last year, I’ve decorated little muslin bags by stamping different Halloween designs on them. Candy treats are tucked into each bag.


© June Scroggin, All Rights Reserved

The basket is stuffed, but we have many, many extras in case the basket empties too soon.


© June Scroggin, All Rights Reserved

Each year I try a different Halloween cake. This year it’s the Over the Moon cake from the October 2009 issue of Country Living magazine (page 68). The instructions call for making black bat cookies as decorative elements.


© June Scroggin, All Rights Reserved

Since I had to dig out my bat cookie cutter, I thought I’d go ahead and make a simple drawstring bag to store my Halloween cookie cutters.


© June Scroggin, All Rights Reserved

The end result is a hauntingly-festive dessert to offer my sister Connie and her husband Jim when they come for dinner tonight.


Have a boo-ful Halloween!

Thursday, October 29, 2009

Brunhilda's Midnight Ride

Brunhilda is ready for Halloween night. I finished a pillow featuring her late yesterday from a pattern created by Crabapple Hill Studio.


© June Scroggin, All Rights Reserved

My finished pillow is 12-inches wide and 45 inches in length, fitting just right on our small couch. You get to do all kinds of things with this whimsical project: draw (trace), embroider, piece, sew, and embellish with beads and fun trims. I love projects that engage me in multiple ways.


© June Scroggin, All Rights Reserved

I took the pillow outside to try to get pictures in a better light. Crabapple Hills Studio offers quite wonderful projects. I’ve made some of them before and always enjoy them.

An extra great thing about this pillow is that the outside case can be removed for washing. Now I’m thinking maybe a Christmas or other holiday design could be stitched and then simply insert the separate pillow I made out of muslin.


© June Scroggin, All Rights Reserved

The pattern calls for using Weeks Dye Works floss; however, my local cross-stitching store closed months ago and this floss isn’t carried at Jo-Ann’s. So I substituted DMC to approximate the colors as best I could: DMC 3852 instead of Weeks’ Marigold #2225, DMC 3776 instead of Weeks’ Pumpkin #2228, and DMC 413 instead of Weeks’ Kohl.


© June Scroggin, All Rights Reserved


The fabrics I chose match the floss colors pretty closely. The embroidered is worked on a cream fabric. Instead of a bright orange, I chose fabric with a bit of orangy-clay tones to it, the black is a subtle print which goes well with the witchy concept, and the third fabric has kohl-colored swirls which seems like Halloween night to me.

Brunhilda is ready for Halloween night’s merry mischief.

Wednesday, October 28, 2009

Make Easy Jack O’Lantern Treats

When my siblings, cousins, and I were wee children, my grandmother made us simple little treats using pieces of leftover dough on her pie baking days. She’d cut the dough into strips and sprinkle them with cinnamon before baking them. The fragrance coming out of Grandma’s oven made us drool in anticipation.


© June Scroggin, All Rights Reserved

Many years later when I had my own children, I discovered a similar trick perfect for Halloween—Jack O’Lantern treats made of flour tortillas and cinnamon sugar.


© June Scroggin, All Rights Reserved

All you need to make these treats are non-stick cooking spray, flour tortillas (in whatever size you wish), and cinnamon sugar.


© June Scroggin, All Rights Reserved

  1. With a sharp knife, cut out various Jack O’Lantern faces in the tortillas. Keep the tortillas covered with a damp cloth and just use one tortilla at a time.
  2. Spray a skillet with Pam, heat the skillet on medium high, and plop in a tortilla. When the tortilla shell starts to bubble (this only takes a few seconds), quickly flip it over and repeat for the other side.
  3. Lift it out and place on a plate, generously sprinkling cinnamon sugar on both sides.
  4. Do the same for additional tortillas.
  5. Eat ‘em up right away.

Tuesday, October 27, 2009

Paula and June's Most Excellent Adventure

Warning: Graphic intensive

Yesterday my friend Paula, her husband Sam, and I embarked on a Halloween adventure to Apple Annie's in Willcox, AZ. Our mission: seek the Great Pumpkin, wander through the corn maze, and gather a bounty of vegetables in the fields.


© Sam Flores, All Rights Reserved

The first thing to do when embarking on an outing to Apple Annie’s is to stop by Stout’s Cider Mill at Exit 340 on I-10 for a taste of their cider and place your order for one of their humongous homemade apple pies for pickup after the Apple Annie’s excursion.


© Sam Flores, All Rights Reserved

Then we were off to Apple Annie’s Orchard where we found apples and pumpkins, purchased apple cakes in the bakery, bought boxes of homemade fudge and cute pumpkin hats—don’t we look adorable? Yes, of course we do.


© June Scroggin, All Rights Reserved

We bought Bolga Baskets made from elephant grass by farm families in Bolgatanga, Ghana, West Africa. Proceeds go back to the makers to supplement their unpredictable crop income.


© Sam Flores, All Rights Reserved

The sunflowers are past their prime, but we did find a few still blooming.

Next was a short drive to Apple Annie's Produce & Pumpkin Farm. More pumpkins ensued, of course, but our prime purpose was to walk the Corn Maze and pick veggies in the fields. This is my first ever trip to a maze.


© Sam Flores, All Rights Reserved

The maze is cut into 18 acres of corn and has over 6 miles of pathways, but clues lead you through. Paula and I were the only people in the maze, Sam stayed at the beginning in case we got lost and needed a search party. Here we’re giggling because they’re letting two directionally-challenged crazy women venture into the maze unsupervised.


© June Scroggin, All Rights Reserved

Hey, guess what, Paula? There’s actually corn in this maze.


© June Scroggin, All Rights Reserved

Do you think we need to carry some kernels to mark our way?


© Paula Flores, All Rights Reserved

Which way do we go?


© Sam Flores, All Rights Reserved

Sam was waiting at the exit to capture our exultant emergence as we skipped happily, thoroughly “amazed” not to be permanently lost.


© June Scroggin, All Rights Reserved

Conquering the maze earned us a patch.


© Sam Flores, All Rights Reserved

Next was a bit of picking in the fields, this is in the black-eye pea section. We came home with green beans as well as green tomatoes which I’m going to fry.


© Sam Flores, All Rights Reserved

Did you know black-eye peas look like this, Paula? I’ve only ever seen them in a can.


© June Scroggin, All Rights Reserved

We made a quick stop back at the wonderful Stout’s General Store to pick up our monster apple pies and our most excellent adventure was done. Thank you, Sam, for being our chauffer, photographer, and all-around good guy in putting up with us.

Monday, October 26, 2009

Make Halloween Cookie Mix Gifts

I don’t know why I do this, but I’ve stockpiled projects over the years instead of doing them right away. Maybe my brain worries I’ll run out of crafty ideas and such a backlog makes me feel better. Who knows? Suffice it to say there’s always something creative to do at my house.


© June Scroggin, All Rights Reserved


In 2005 I saw bagged Halloween cookie mixes in the stores and thought they’d make nice gifts. This is the original Make & Paint Vanilla Sugar Ghost Cookies kit I purchased. Along with the dry ingredients, it includes the recipe, instructions, and a ghost cookie cutter. I bought one kit and saved it as it dawned on me I could make my own, similar to the frugal gifts-in-a-jar projects you find on the Internet. The project is being implemented this year as Halloween treats for our neighbors.


© June Scroggin, All Rights Reserved


Ghost cookie cutters found on sale were added to my stash. Then I discovered Halloween bandanas in the same fabric as used for the store-bought kit on clearance at JoAnn’s for $1 each after Halloween a couple of years ago. Last week the same bandanas were in stock and priced at $1.94, but any Halloween fabric will work.

Now all the packaging components are gathered, it’s time to make the cookie mix. Assemble and bag the following dry ingredients:

  • 1½ cups powdered sugar
  • 2½ cups Gold Medal all-purpose flour
  • 1 teaspoon baking soda
  • 1 teaspoon cream of tartar

© June Scroggin, All Rights Reserved


Plastic treat bags work for the dry ingredients. I added a can of icing in case the recipients want to decorate their cookies.


© June Scroggin, All Rights Reserved


An instruction card helps your recipient know what to do; just tuck it inside your gift set.


© June Scroggin, All Rights Reserved


I traced around one of the cookie cutters to make a tag template; use it if it’s helpful to you.


© June Scroggin, All Rights Reserved

Here are our finished gifts which we’ll deliver this week. This same project can be used for any holiday by merely changing the fabric, cookie cutter shape, and modifying the name of the cookies.

Thursday, October 22, 2009

Spooktacular Magnets

Magnets are always fun to make any time of year. I’ve made a couple for Halloween.


© June Scroggin, All Rights Reserved

The magnets were made using the free project download found here offered by Kreinik.


© Dub Scroggin, All Rights Reserved

Kreinik’s glow-in-the dark embroidery floss makes these magnets a bit extra special at night when you turn out the lights. We took them outside last night to try to capture their glow. How fun to walk in the kitchen at night to get a drink and be greeted by Frankenstein or a witch glowing on the fridge.


TIP


Source: Amazon.com

It occurred to me you can also make magnets for other holidays or themes by emulating the process in Kreinik’s Spooktacular Magnets project and using small cross-stitch patterns found in such books as this one I have in my collection: Better Homes and Gardens 2001 Cross Stitch Designs: The Essential Reference Book (Better Homes & Gardens Crafts)

Saturday, October 17, 2009

Halloween Party Blog Hop: Practical Magic Movie Night


My blog is participating in today’s Halloween Party Blog Hop hosted by A Fanciful Twist blog.


I’m hosting a Practical Magic movie night, something I’ve watched each year in October since the movie was first released. I love this movie.


© June Scroggin, All Rights Reserved

Here’s your invitation. I used old movie reels my husband had. Each invitation was printed on paper I carefully cut into “film strips” and wrapped around the reel. A graphic of the house in the movie worked for the label.


© June Scroggin, All Rights Reserved

Goodies are being concocted in the cauldron on the stove and almost ready.


© June Scroggin, All Rights Reserved

Here’s the menu.


© June Scroggin, All Rights Reserved

The Sweet Bones and Witch Fingers are ready for munching (click links for Martha Stewart’s recipes).


© June Scroggin, All Rights Reserved

Decorations are in place and the table set. Let’s talk and laugh as we eat.


The movie is in the DVD player, let the magical story unfold.


© June Scroggin, All Rights Reserved

When I recently visited the island of CuraƧao, I bought a bottle of their special liqueur just to make the following recipe.


© June Scroggin, All Rights Reserved

Time for Midnight Margaritas and a dancing frolic around the house to Harry Nelson’s "Lime in the Coconut” music! Click on the recipe to enlarge for printing—just like magic. Click this link for the YouTube video of the movie’s Midnight Margaritas scene to get you going—have your drink ready first!


© June Scroggin, All Rights Reserved

After all the food we’ve eaten, the margaritas we’ve drunk by the gallon as we danced, and the excitement of the movie, we’re sleepy and it’s time to say goodnight. But don’t forget your party favor, a tote for each of you. I printed the original movie logo on fabric and sewed it to each bag.


© June Scroggin, All Rights Reserved

What’s inside the totes? Here’s one of the surprises—Star of Love spell kits (just like in the movie itself), complete with a candle, small cauldron, instructions, and all you need to keep love in your life. All else hidden in the bag is a mysterious secret.

I hope you’ve enjoyed my movie party—thank you for coming. To quote Aunt Jet: "There's a little witch in all of us."